Detecting impurities on 3-D components

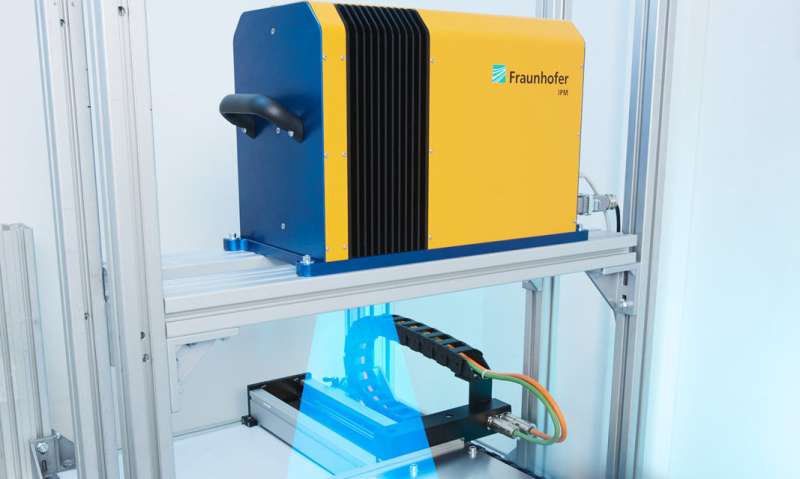
Impurities adhering to the surface of components can cause problems in later stages of the production process – or even make the entire component useless. A new fluorescence scanner developed by the Fraunhofer Institute for Physical Measurement Techniques IPM allows specialists to inspect metallic parts for residues of grease, machining chips and cleaning agents – for every single item in production cycle.
The smallest of details can have huge consequences. For instance, tiny particles of dirt clinging to the surface of components during the production process. The oil pan in vehicle engines is a typical example. If the process lubricant contains impurities that stick to the areas where the sealant will be applied, the seal will not be tight and the oil pan is likely to leak at this vulnerable point. Until now, it has not been technically possible to examine every single component for residual contaminants. The only solution was to test random samples, which is not only time-intensive but also fails to identify the exact spot on the component contaminated by foreign substances.
Spatially resolved inline measurement = 100% quality
In future, manufacturers won't need to worry about such questions of contamination. The answer lies in the inline fluorescence scanner developed by researchers at the Fraunhofer Institute for Physical Measurement Techniques IPM in Freiburg. "This scanner not only enables us to perform inline measurements on every single metallic component – during the production process and without requiring additional time – but also enables us to pinpoint the exact location of the dirt particles," explains Andreas Hofmann, Business Development Manager at Fraunhofer IPM. "The outstanding spatial resolution of this system enables us to identify even the slightest deposits or films of less than ten milligrams per square meter."
Fluorescence detectors for oil films, machining chips and other contamination
The system works as follows: While the oil pan travels from point A to B on the conveyor belt, a point-source UV laser scans a specific area of the component. If traces of grease, remains of organic cleaning fluids, or fibers are detected on the surface, they reflect light in the visible fluorescence spectrum as a sort of response to the laser's UV light. The sensitive detector that captures these light frequencies ignores all other wavelengths, and is thus able to interpret the fluorescence signals as signs of con-tamination.
The metallic component itself does not reflect beams of fluorescent light. A scanner ensures that the laser focus passes over the surface at high speed, creating a point-by-point grid. The laser beam scans the object at a rate of approximately 200 times per second. As a result, the quality controller receives an image showing precisely where any dirt particles or oil films have been detected.
The fluorescence scanner is even capable of detecting metallic chips that adhered to the test object in previous machining steps, even though they are not fluorescent. "The preprocessed components are cleaned using water or compressed air. Any remaining chips are contaminated with oil or other fluorescent substances," says Hofmann.
Spatial resolution and processing speed adaptable to the production process
The researchers can adapt the system's spatial resolution and processing speed to the needs of the production process, for instance just-in-time manufacturing. And the fluorescence scanner is not restricted to applications involving metallic components – although further studies will be needed to adapt it to other materials.
Provided by Fraunhofer-Gesellschaft


