Infrared camera to ensure high-quality 3-D reproducibility of parts

The addition of a new infrared camera at Argonne's Advanced Photon Source narrows the gap between basic and applied research in additive manufacturing.
One of the largest challenges facing the 3-D printing industry is how to ensure high-quality reproducibility of parts. Without better insights into how to detect and stop defects, the technology has limitations when producing commodity parts.
That much-needed insight is at industrial designers' fingertips now, thanks to a new tool available to industry and researchers at the U.S. Department of Energy's (DOE) Argonne National Laboratory. The installation of an infrared camera to the high-energy X-ray source at Argonne's Advanced Photon Source, a DOE Office of Science User Facility, allows researchers to measure thermal signatures across surfaces in real time.
Argonne was the first U.S. national laboratory to integrate a metal 3-D printing apparatus into a beamline, or photon path, for X-ray diagnostics. It is also the only national laboratory that can view the metal powder melting within the so-called "melt pool" area in less than a nanosecond. Adding the high-speed infrared camera to a synchrotron beamline is another first, and enables researchers to more closely replicate the deposition processes that occur on a real manufacturing floor.
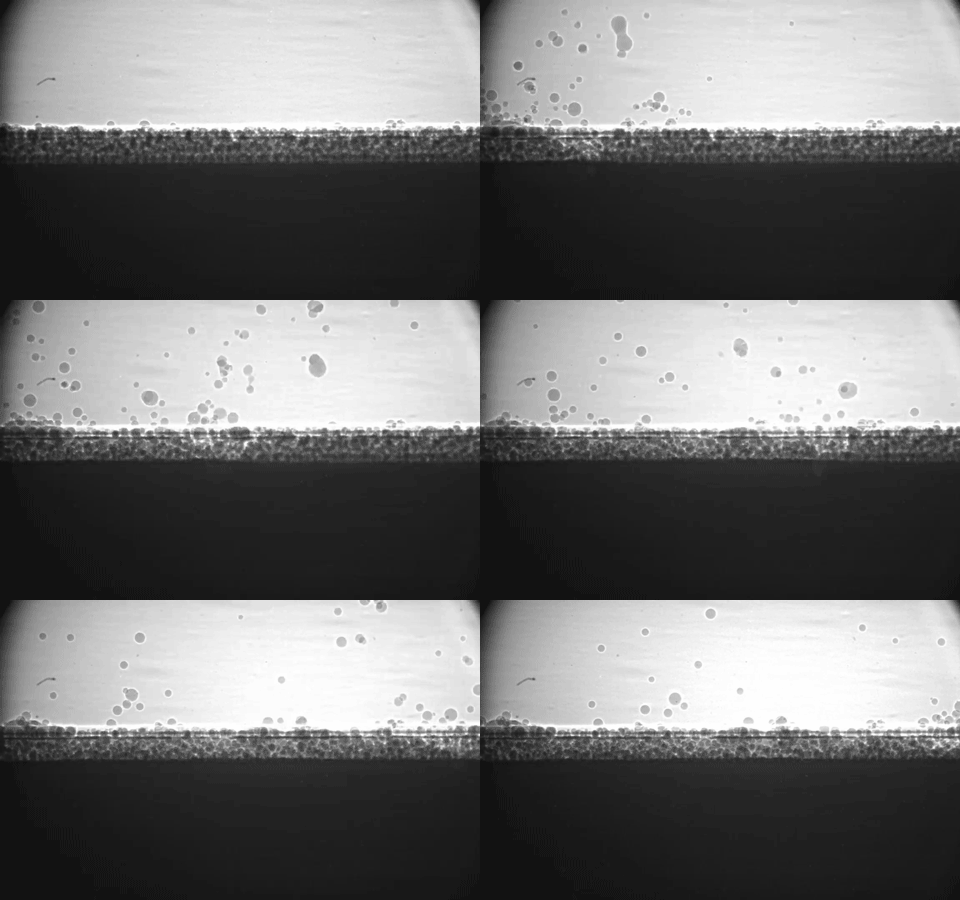
The combined diagnosis tools let industry and researchers capture X-ray images at 1,000,000 frames per second and thermal images at 100,000 frames per second during the 3-D printing processes. This creates movies of the formation of key defects caused by melt pool instability, powder spatter ejection and inappropriate scan strategy.

Complementary imaging
Used side by side with X-ray microscopy, high-speed thermal imaging can deliver novel insights into how much and how fast different regions in the part heat up and cool down during the entire build, which involves millions of laser line scans. These insights can be used to reduce variations in the design of parts, and improve the efficiency of additive manufacturing for consumer products, defense, medicine, automotive and many other field applications.
"Infrared and X-ray imaging complement each other," said Argonne physicist Tao Sun. "From one side you have the X-rays penetrating the sample to help you see the microstructures without any thermal information, while on the other you have the infrared camera capturing many thermal signatures associated."
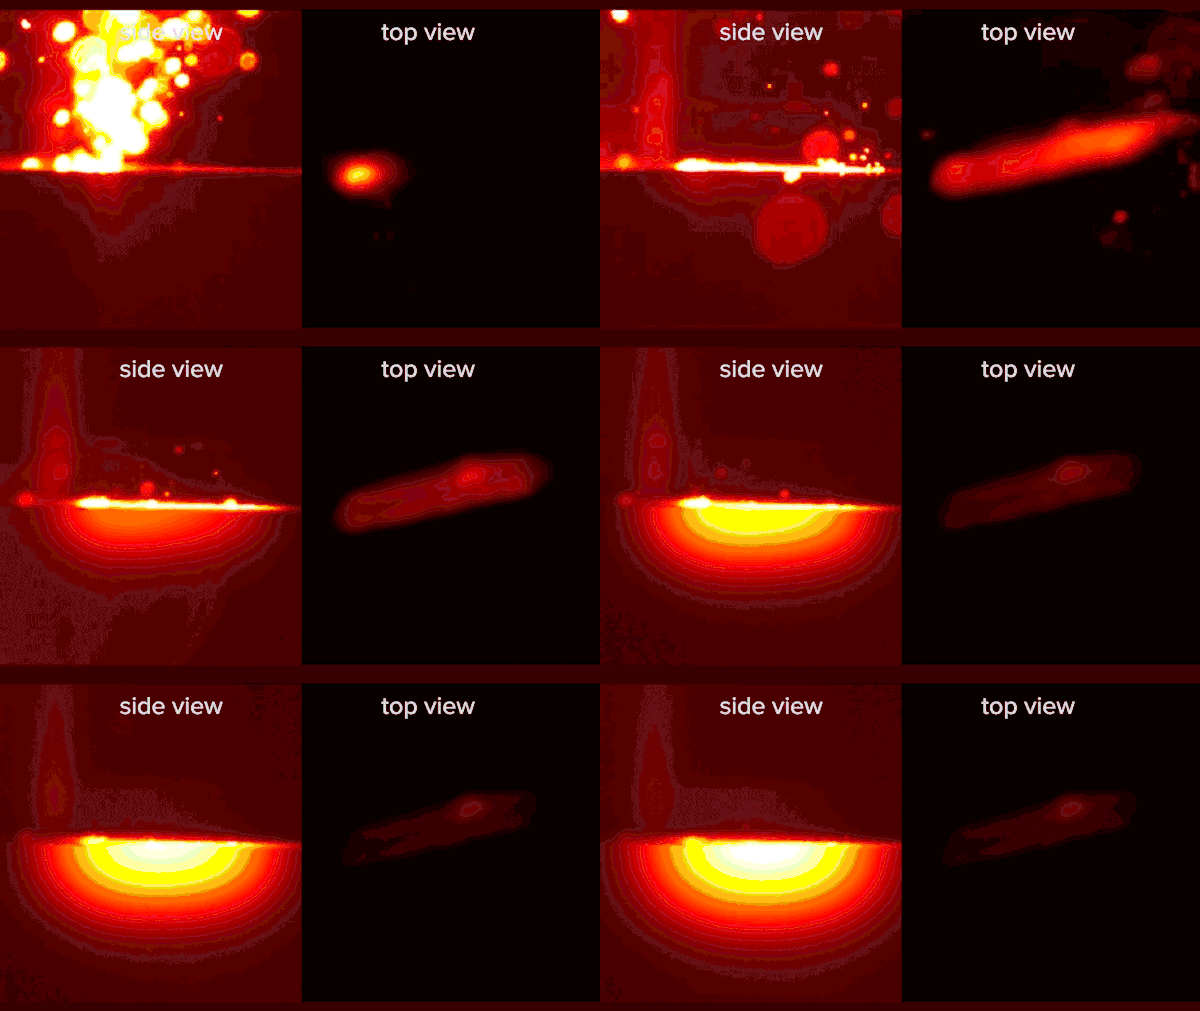
One way the infrared camera augments X-ray imaging is by helping visualize the formation of plumes of vaporized powder, which form as the laser hits and moves across the powder. These plumes, high in heat, can disrupt the performance of the laser.
These plumes cannot be seen using X-rays alone due to the vaporized state of the particles, but are captured by infrared light. Alongside measurements taken by X-rays, such data, as well as other important parameters including heating and cooling rates, can feed into models of 3-D printing to improve their accuracy and speed.
Bridging basic and applied science

Another key benefit of infrared cameras is their ability to be integrated into additive manufacturing systems, bringing the fundamental research done at the APS closer to real-world users.
Sun and Greco see a future where the users of additive manufacturing systems could attach infrared cameras to their machines to leverage insights found from coupling X-ray and infrared imaging, such as a thermal signature (found through infrared imaging) correlated with the formation of a defect (captured through X-ray imaging). If found, users could single out when defects were forming in their own systems based on a given signature, and take preemptive measure to mitigate or fix the problem.
Such potential applications are far out in the future, Sun said, but exemplify the potential benefits to integrating both imaging techniques.
"Not everyone is lucky enough to have access to a powerful X-ray light source like the APS, so if we can find ways to deliver information and tap into tools that most people have access to, like thermal cameras, we can have an even greater impact on the field," he said.
The infrared camera is located at the Advanced Photon Source's 32-ID-B beamline. The IR camera was funded through an LDRD program as part of Argonne's Manufacturing Science and Engineering Program. See a video about this new technology here.
Provided by US Department of Energy


