PML study supports validity of toolmark identification in forensics

Toolmark identification is an important forensic discipline where scrape and impression marks found at a crime scene are used to identify the type, brand, or specific tool that generated the mark. Common tools used during a crime are hammers, crow bars, wire cutters, chisels, screw drivers, and punches.
For the better part of a century, forensic examiners have relied on comparison microscopes to compare the microscopic features of toolmarks found at a crime scene with those generated by suspected tools. The process relies on an examiner's training, experience, and judgment to assess the whether two compared toolmarks are more similar than toolmarks generated by different tools. Furthermore, the microscopic images provide only an indirect measure of the underlying toolmark surface topography though slope variations and shadowing, and are affected by lighting conditions, exposure settings, and variations in reflectivity.
In 2009, the National Academies published the report "Strengthening Forensic Science in the United States: A Path Forward," which called into question the objectivity of conclusions based on visual toolmark identification by examiners. A major concern is the lack of precisely defined, and scientifically justified, protocols that yield objective determinations of a match or non-match with well-characterized confidence limits and/or error rates. PML researchers Xiaoyu (Alan) Zheng and Johannes Soons of the Semiconductor and Dimensional Metrology Division, and Summer Undergraduate Research Fellowship (SURF) students John Villanova (2012) and Taher Kakal (2013), have responded to this criticism by seeking to strengthen the scientific basis of the toolmark identification process through the use of mathematically objective similarity metrics applied to direct measurements of the surface topography. The work builds on research by the Surface and Nanostructure Metrology Group and the NIST Office for Law Enforcement Standards (OLES) on forensic firearm identification using toolmarks found on bullets and cartridge cases.
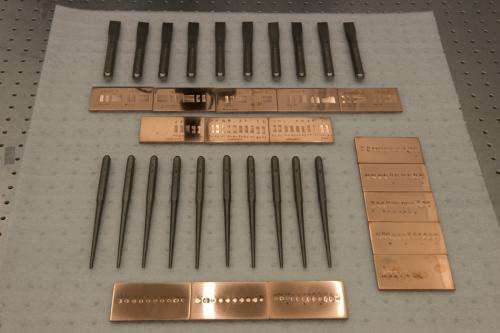
For this study, Zheng obtained 10 consecutively manufactured chisels (for making striated toolmarks) and 10 consecutively manufactured drift punches (for making impressed toolmarks) from a major commercial tool supplier.

"Robert Thompson, my OLES program manager, went to Western Forge," Zheng explains. "He sat there and witnessed a machinist make each of these tools one at a time. He took them sequentially off the production line, and brought them to NIST."
Identifying a particular tool from a pool of consecutively manufactured tools represents a challenging scenario, as the tools are more likely to have similarities in their geometry.Zheng further raised the bar for the identification process by creating a special setup for the reproducible generation of toolmarks. Currently, forensic examiners create comparison toolmarks by hand, which may introduce unintended variability in the toolmark pattern. A reproducible method of generating toolmarks increases the probability of false identifications (false positives) which, from a legal perspective, represents the most critical error rate. "We wanted to lock down a lot of the variables for this study," Zheng states. "We can control the tool motion, speed, orientation, and contact force, so that we get a very high level of toolmark reproducibility. This high reproducibility, combined with the use of consecutively manufactured tools, yields a very challenging scenario for avoiding false identifications. If you can correctly identify the toolmarks using very repeatable methods, then you should be able to make identifications using less repeatable methods."
In the blind study, Zheng first created 20 known chisel marks, two marks per chisel, by using the rig to drag each chisel across the surface of polished copper plates. Then the chisel identities were hidden. After randomization, 20 unknown toolmarks were generated. The rig was then modified to create the punch toolmarks. The tool holder was fitted with a drift punch and toolmarks were generated through a controlled drop from a height of 170 mm (6.69 in). Again, the marks were made on polished copper plates, and 20 known and 20 unknown marks were collected.
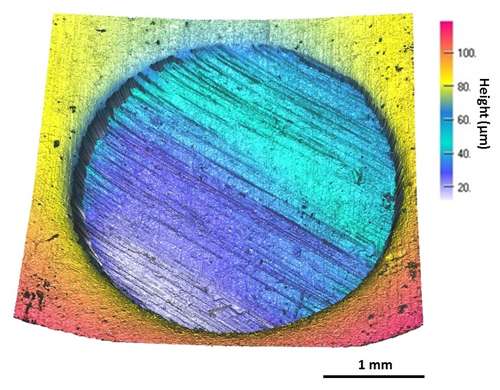
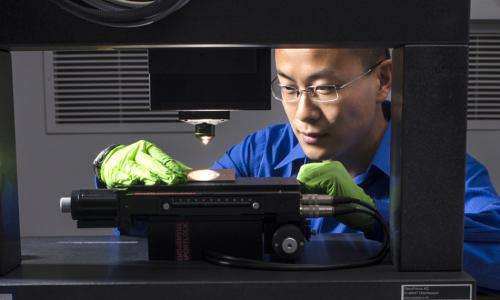
To take on the daunting challenge of trying to match 40 unknown toolmarks (20 chisel marks and 20 punch marks) to 40 known toolmarks, Zheng opted to use more sophisticated instrumentation. Zheng used a 2D stylus instrument to measure the cross-section profile of the striated (chisel) toolmarks and a 3D disc scanning confocal microscope to measure the topography of the impressed (punch) toolmarks. Zheng used algorithms created by Soons to automatically filter and register the topography data from two samples and calculate an objective measure, the ACCFMAX metric, for their similarity. "We take the known marks, measure them, and do a 20 by 20 correlation," Zheng explains. "We see how well they match to each other. Marks generated by the same chisel or punch should match really well, but the marks from different chisels or punches should not match."
Using the distributions of the similarity metric for the known matching and non-matching comparisons, an identification baseline was statistically established. Once the data analysis of the known marks was completed, Zheng was able to use the identification baseline to automatically and correctly identify the tool that generated each unknown toolmark.

"There was no human intervention in identifying which ones match and which ones don't," Zheng confirms. "It was all done by computers without investigator bias."
The study not only provides support for the validity of the toolmark identification process, it has the potential to revolutionize the process by improving the data quality and by removing human error and subjectivity from the analysis.
Looking ahead, Zheng is focusing on a new collaboration, this time examining bullets, with a forensic laboratory in Alabama that was able to procure a confocal microscope. This will be the first toolmark comparison involving topography data obtained by two different labs using different instruments on the same set of bullets. The goal of this study is to gain confidence in the application of surface topography metrology and objective comparison criteria. Zheng, Soons, and Thompson received a grant from the Department of Justice, National Institute of Justice, to develop a "Reference Ballistic Toolmark Database for Research and Development of Identification Systems and Confidence Limits." This open database of toolmark data will enable researchers and manufacturers to test and validate new approaches to objective toolmark identification and ease the transition to three-dimensional surface topography data. At NIST, the database will be used to further validate error rate estimations using the Congruent Matching Cells (CMC) method developed by PML researcher Jun-feng Song as part of the NIST forensic measurement challenge.
Provided by National Institute of Standards and Technology


