Measuring in 3-D

Today, complex optical free-form geometries are used primarily in car headlamps and in optics for cameras and digital projectors. These optical components are expensive to manufacture and to test. At Hannover-Messe on April 21-25, scientists from the Fraunhofer Institute for Applied Optics and Precision Engineering IOF in Jena will be presenting the 3-D measuring system LensShape, which renders the manufacturing process faster and more cost-effective.
“The lenses used in many optical components today – for instance in car headlamps, or in digital projectors or cameras – are no longer spherical, but have free-form geometries,” says Dr. Gunther Notni of the IOF. “Free-form geometries are not rotationally symmetrical, but may be surfaces of any shape. This makes them expensive to manufacture, and the conventional methods used so far have not allowed the lenses and mirrors to be tested thoroughly enough.
Until now, it has taken over an hour to measure the aspherical lenses using high-precision coordinate measuring devices.” For Carl Zeiss Jena GmbH, this was reason enough to develop a new measuring system for the expensive lenses in a collaborative project with the Fraunhofer researchers and IVB GmbH, a small local company.
LensShape is the result of successful cooperation between research and industry in the optical technologies. Taking ‘Success Built on Cooperation – A Faster Route from Ideas to Products’ as its motto, the Fraunhofer-Gesellschaft has already set up 11 innovation clusters all over Germany. The Jena Optical Innovation cluster JOIN is one of them.
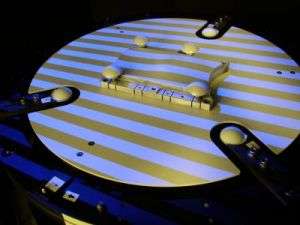
The optical 3-D scan system enabled the scientists to increase the speed significantly: The measuring process now takes a mere 15 minutes. There are other advantages, too: Since the surface is not touched by a scanner, scratches are avoided and the process can immediately be corrected with the aid of the data obtained. Notni explains the benefits of the new method: “We project fringe patterns onto the free form with a digital projector.
These are recorded with a CCD camera from different directions. We then analyze the fringe bending on the computer, using a special mathematical method. Deviations from the reference values of as little as one micron can be quickly and easily identified. What makes the new method unique is that the data obtained can also be used for the subsequent grinding process, and this rounds off the correction cycle.”
It is not only the manufacturers of car headlamps and projector lenses who will soon benefit from the new test method. “While Carl Zeiss GmbH requires the version that measures up to 300 millimeters, we can also measure smaller lens systems down to less than 10 millimeters,” states Notni, explaining the potential that this new measuring method offers. Another well-known optics manufacturer is currently testing the technology with a view to measuring particularly small lens systems for tapping light from LEDs. IVB GmbH began marketing the new method several months ago.
Source: Fraunhofer-Gesellschaft


