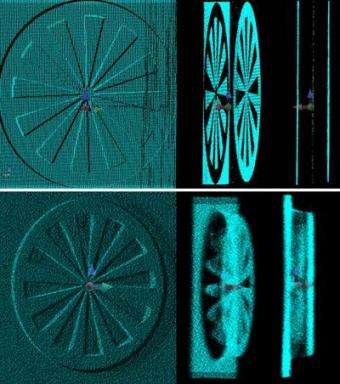
The two sets of images above show data obtained from two instruments used to measure a slotted disk. The top set shows less noisy or more precise data. Credit: NIST
Three-dimensional imaging devices are becoming important measuring tools in the manufacturing, construction and transportation sectors. Numerous models of the imaging devices, capable of digitally capturing the existing conditions of objects from as small as pipe fittings to as large as an entire bridge, are on the market. A lack of standard tests to verify manufacturers' performance specifications is inhibiting wider market acceptance of these devices.
In response, researchers at the National Institute of Standards and Technology (NIST) recently established an indoor, artifact-based facility to create new test protocols and performance measures to evaluate such 3D imaging systems. Several prototype artifacts (e.g., spheres, a stairway, and a slotted-disc) are currently being tested for evaluating both instruments and software.
NIST researchers reported on progress in establishing the new facility at a recent conference. The new facility is part of a larger effort to provide standard test protocols and associated facilities for evaluating and calibrating these instruments. In addition to the indoor, artifact-based facility, NIST also operates an indoor 60 meter (m) range calibration facility and is developing a separate 3D facility so that manufacturers or research groups can send in instruments for spatial calibrations. Finally, NIST will establish an outdoor ranging facility for evaluating the performance of 3D imaging systems up to 150 m to 200 m.
This summer a consensus-based standards development process will begin. Protocols for evaluating the range performance of imaging devices as well as a draft list of commonly used terminology developed during a series of workshops held at NIST, will be submitted to ASTM International, a standards-development organization.
These standards will provide objective, repeatable comparisons of different 3-D imaging devices, reduce confusion about terminology and increase user confidence in the systems, according to Alan Lytle, leader of the NIST Construction Metrology and Automation Group.
Reference: G.S. Cheok, A M. Lytle and K.S. Saidi. Status of the NIST 3D imaging system performance evaluation facility. April 17-21 2006. SPIE Defense and Security Symposium. Paper 6214-17.
Source: NIST


