Sixteen nanometres in 3D

Tomography enables the interior of a vast range of objects to be depicted in 3D – from cellular structures to technical appliances. Researchers from the Paul Scherrer Institut (PSI) have now devised a method that opens up new scales of tomographic imaging and will thus make the detailed study of representative volumes of biological tissue and materials science specimens possible in future. Until now, the relevant details on a scale of a few nanometres were only visible with methods that required very thin samples.
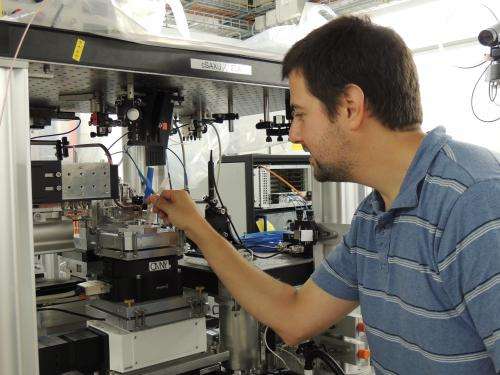
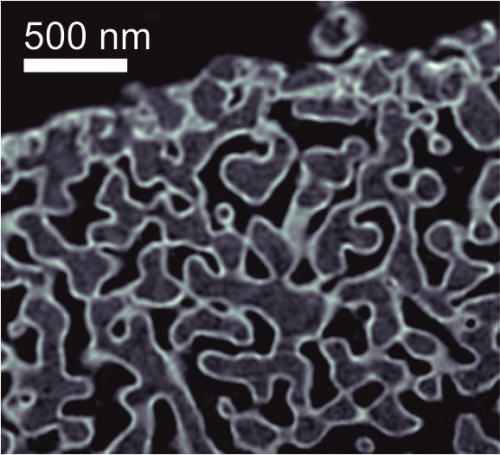
With the aid of a special prototype set-up at the PSI's Swiss Light Source (SLS) the researchers have now achieved a 3D resolution of sixteen nanometres on a nanoporous glass test sample, a feat that is unmatched for X-ray tomography. The measurement is non-destructive, so it allows to study small details in the context of their surroundings or to analyse larger sample volumes in such a way that the information obtained is influenced less by locally induced variances. The resolution of 16 nm was achieved on a prototype of the OMNY instrument, which is still under construction. The final version will enable the researchers to cool down the sample during the experiment to prevent X-ray induced sample damage.
In everyday life, we mostly know X-ray imaging as a medical procedure that enables physicians to see inside the human body without harming the patient. Nowadays, however, different imaging methods play a role in a wide range of research fields, where they enable three-dimensional imaging for a vast array of applications– ranging from biological tissue, technical devices such as catalysts, fossils to antique works of art. Researchers from the Paul Scherrer Institut have now developed an instrument that makes X-ray tomography possible at an unprecedented 3D resolution. It is specialized for studies where researchers are interested in details that are a few nanometres in size, such as the fine structures of cell components or modern catalysts and batteries. Until now, such fine details could only be rendered visible with the aid of electron microscopes, which are not able to display the interior of the samples studied unless ultra-thin samples or sectioning is used. Consequently, the preparation or measurement method could cause damage to the structures of interest. Moreover, it was difficult to display the structures including their actual environment. For thick samples, hard X-ray tomography was limited to a resolution of around 150 nanometres.
For many years, X-ray tomography has been conducted at various synchrotron light sources, such as the Swiss Light Source at the PSI. This kind of imaging involves screening the object from different directions with X-ray light in such a way that a fluoroscopic image – a so-called radiograph – is generated each time, much like a medical X-ray CT scan. With the aid of special computer software researchers combine these images to form a three-dimensional picture, where the material distribution is visible in three dimensions.

High resolution thanks to alternative imaging method
Researchers at the PSI have now opted for an alternative approach to achieve a considerably higher resolution. The simple creation of a radiograph as a fluoroscopic image restricts the resolution that can be achieved. Therefore, the method presented here, ptychographic imaging (first demonstrated in its modern form with X-rays at the PSI in 2010), exploits the fact that X-ray light is not only weakened on its way through the sample studied, but also partially scattered. By measuring exactly in which directions how much and also how little light is scattered, the structures of the sample can be deduced. To measure a single scattering pattern, the researchers only illuminate a small area of the sample and repeat the measurement at different points of the sample until the entire sample has been screened. In the end, from hundreds of scattering patterns ptychography provides a single, high-resolution projection that corresponds to a high-resolution radiograph image. As with all tomography methods, the sample is also rotated in small increments and studied from different directions.
Nanometre precision positioning
The researchers tested their instrument on an artificial sample first: a small piece of glass, six micrometres in diameter, which contained pores coated by a thin metal layer. During the measurement, they were able to achieve a spatial resolution of sixteen nanometres – and achieve a world record. "We are talking about an imaging scale here that bridges the gap between conventional X-ray and electron tomography. The resolution is very high, but the sample thickness and thus the volume studied is also comparatively large. The major instrumentation challenge is the fact that the sample had to be positioned with great precision," stresses Mirko Holler, the project responsible. "This is because the accuracy of the sample's positioning had to be greater than the resolution to be achieved. So we had to know the position of the sample to within a few nanometres throughout the entire measurement, which poses new difficulties in an imaging system." The extremely precise positioning and position measurement required novel experimental approaches that were developed at PSI and are now becoming used at many synchrotron light sources all over the world.
"Only a prototype"
This world record was achieved on an instrument that is "really only a prototype", however due to its success access to this prototype is offered to users and is in high demand. The final system is currently under construction and its design benefits from the experience gained here. One key feature of the final instrument, called OMNY (tOMography Nano crYo), is the possibility of cooling the sample significantly during the measurement. "The X-ray radiation damages the samples during the measurement so that they gradually change and even deform. As a result, the measurement resolution is limited by this radiation dose, especially with sensitive objects such as biological materials," explains Holler. "This effect is vastly reduced through cooling, which means that we can also exploit the advantages of the method for measurements on radiation-sensitive materials."
Until the new microscope is completed, the prototype will continue to be used for scientific studies together with users from the SLS. Thus far, for instance, materials such as chalk, cement, solar cells and fossils have been studied in collaboration with various research institutions.
More information: "X-ray ptychographic computed tomography at 16 nm isotropic 3D resolution." M. Holler, A. Diaz, M. Guizar-Sicairos, P. Karvinen, Elina Färm, Emma Härkönen, Mikko Ritala, A. Menzel, J. Raabe & O. Bunk. Scientific Reports 4, Article number: 3857, DOI: 10.1038/srep03857
Journal information: Scientific Reports
Provided by Paul Scherrer Institute


